Creating a Map: Difference between revisions
| Line 52: | Line 52: | ||
Some types of terrain are obviously exclusive with other types of terrain, however some terrain features can co-exist in a hex with other features. Here's a zoomed-in shot showing how to add more than one type of terrain to a hex when designing an input map. This shows a road, some woods, and a height all in the same hex. | Some types of terrain are obviously exclusive with other types of terrain, however some terrain features can co-exist in a hex with other features. Here's a zoomed-in shot showing how to add more than one type of terrain to a hex when designing an input map. This shows a road, some woods, and a height all in the same hex. | ||
[[Image:mapguide6.jpg|border|thumb]] | [[Image:mapguide6.jpg|border|thumb|left]] | ||
== Manual Placement of Map Tiles == | == Manual Placement of Map Tiles == | ||
Revision as of 19:02, 8 May 2012
Before you work on a scenario you should create the map you want to use with the scenario. Maps and scenarios are independent entities in "Conflict of Heroes." You can have one map that is shared by multiple scenarios, for instance.
Map Creation
The easiest way to create a COH map is to start with an "Input Map." An Input Map is a 2048 x 2048 JPEG in which colors correspond to different types of terrain, terrain properties, and elevations.
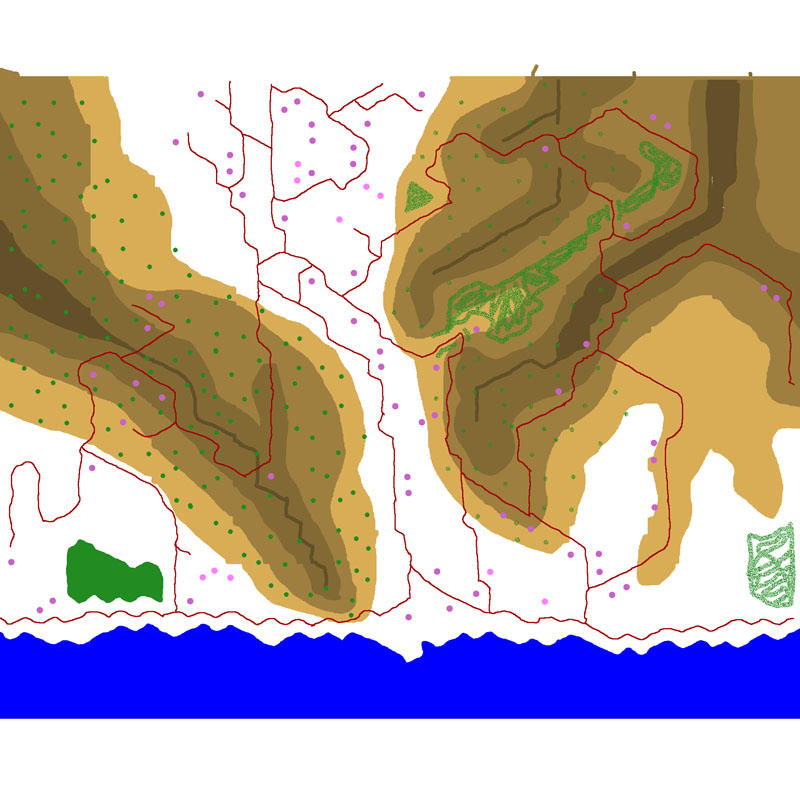
Here's a reduced-size input map called "Black Sea Coast" which I developed based on some Google Earth terrain:
The shades of brown show elevation. Purples are houses / stone houses. Greens are forests. Reds are roads. Blue is water. White is clear. Note that you can have forests with roads running through them on heights by ensuring that a given hex contains all three colors.
Input Maps can be created in any reasonably sophisticated paint program. Creating an input map with reference to the underlying hex-grid allows the developer much more refined control over the map elements, and it's easiest to do this in a paint program that supports multiple layers, such as Photoshop or the free program GIMP.
Parsing the Input Map
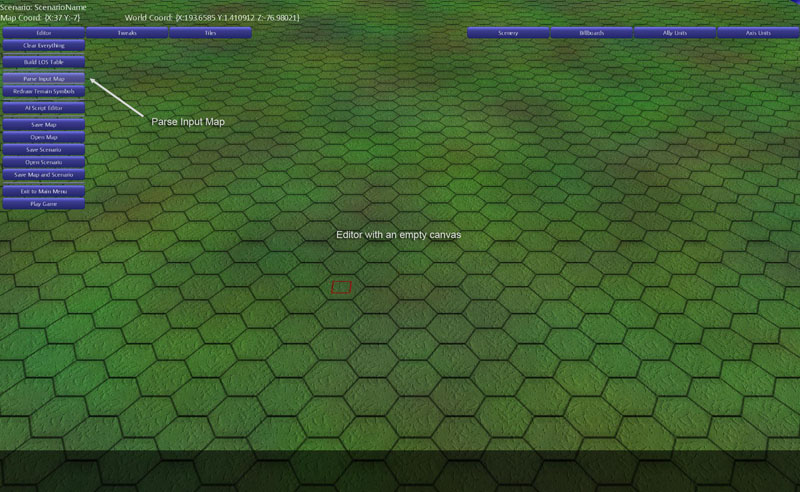
After the user creates an Input Map he can parse that map in the game editor by clicking on the "Parse Input Map" and choosing the appropriate map file. Only maps that are in JPEG format that end in "_input" are allowed as input maps.
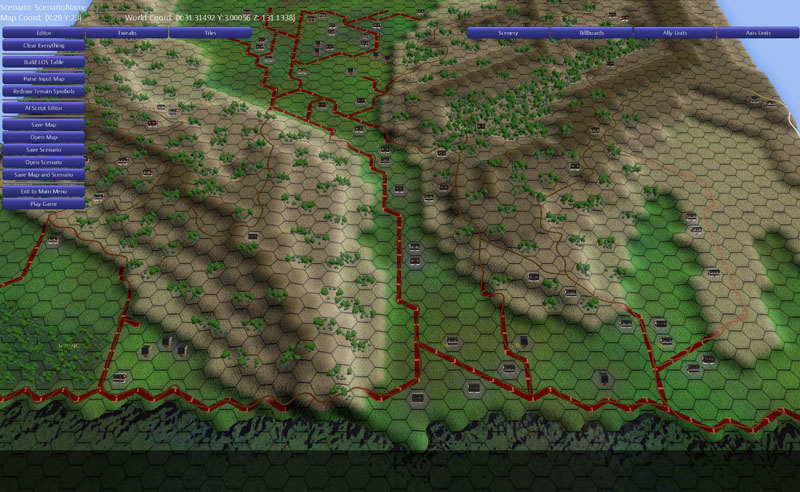
It can take a minute or two to parse the Input Map. When it's done it turns the empty canvas into an *almost* fully-stocked map:
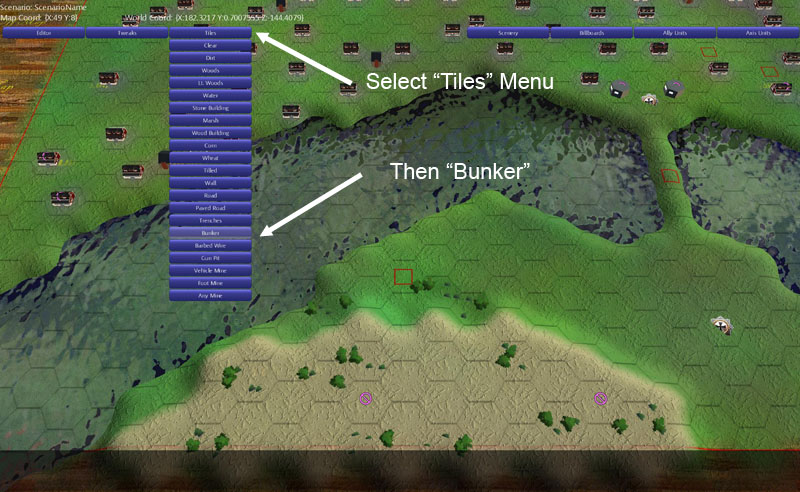
A few of the fussier elements can't be added through the input map mechanism. You'll have to go through and add things like walls, bunkers, barbed wire, and so forth in the map editor after parsing an input map.
The map creation process goes fairly quickly once you get all the mechanics sorted out. I did the map above in about 1.5 hours.
Input Map Template
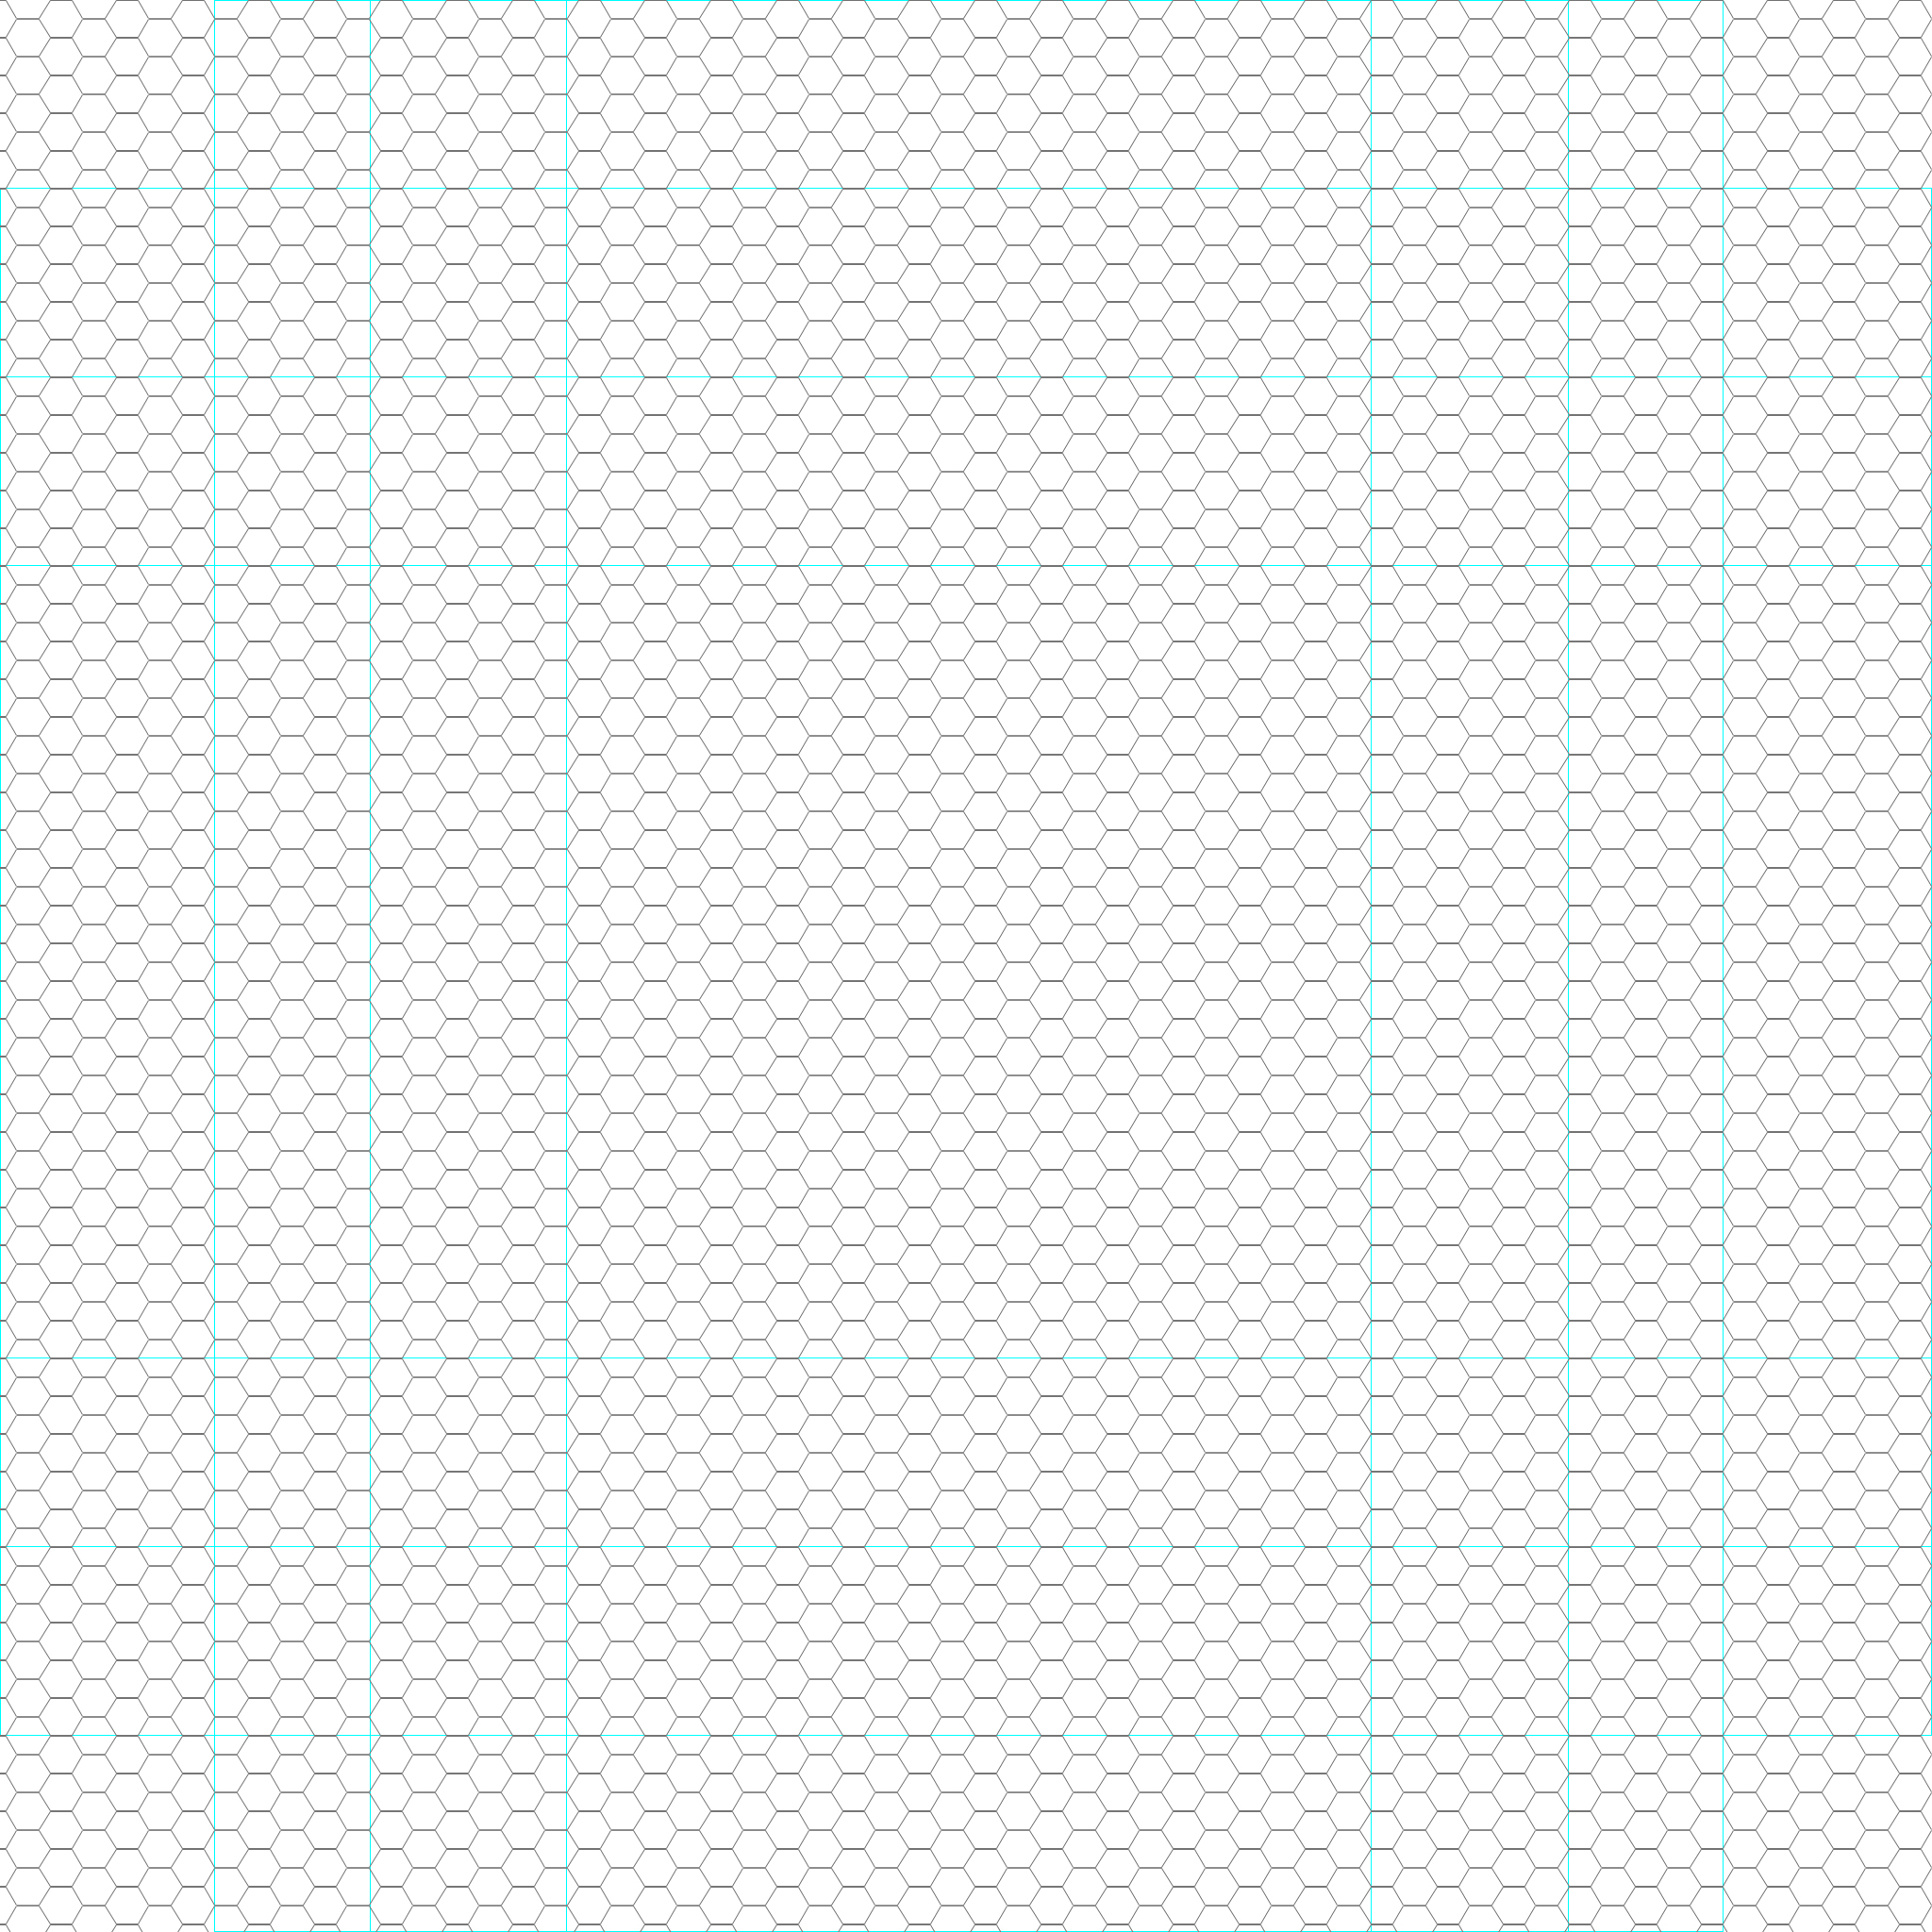
Included in the /manuals sub-folder of your installation directory is a full-size template for creating input maps.
The hex lines shouldn't actually be present on the final input map; this just shows where the hex lines are relative to the terrain information.
The blueish lines represent standard map sizes.
You should use a paint program that has layers, such as Photoshop or GIMP (freeware) to design input maps.
You will find a full-size copy of the above template in the /manuals sub-folder of your installation directory.
Map Palette Guide
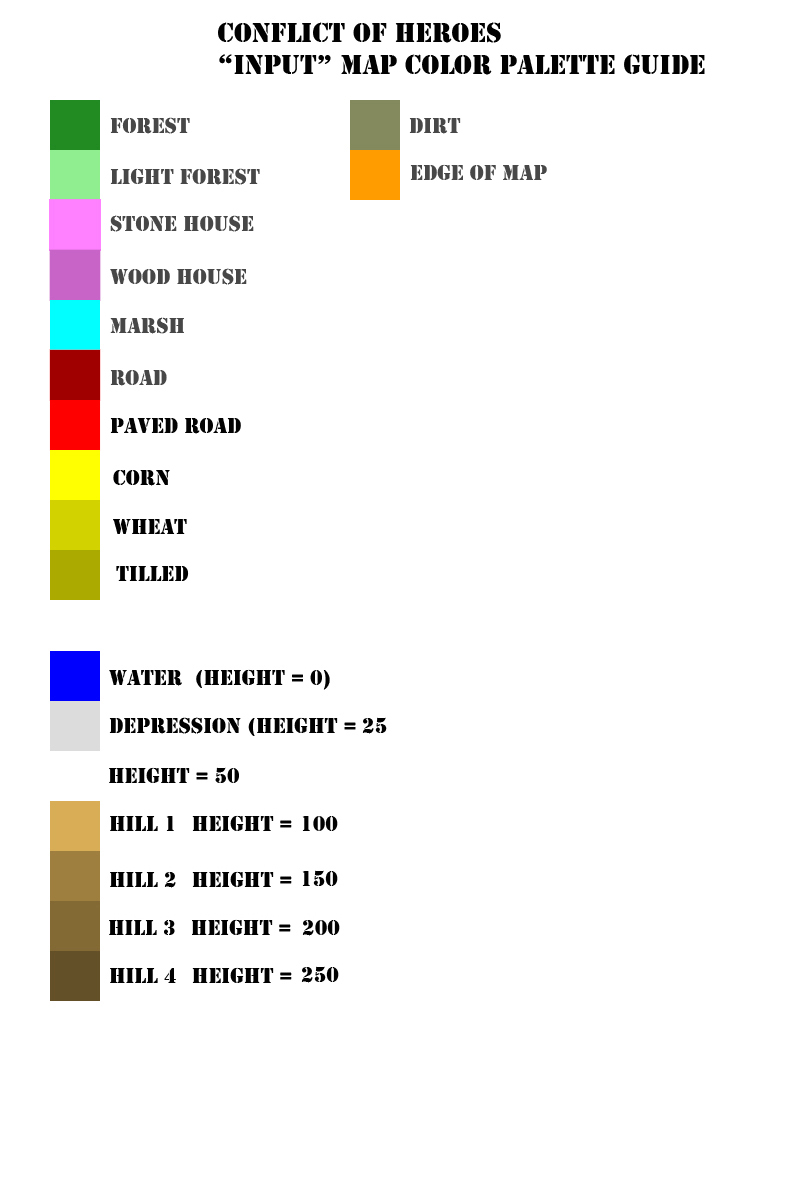
Here is the COH Palette Guide for creating input maps.
Terrain Interactions
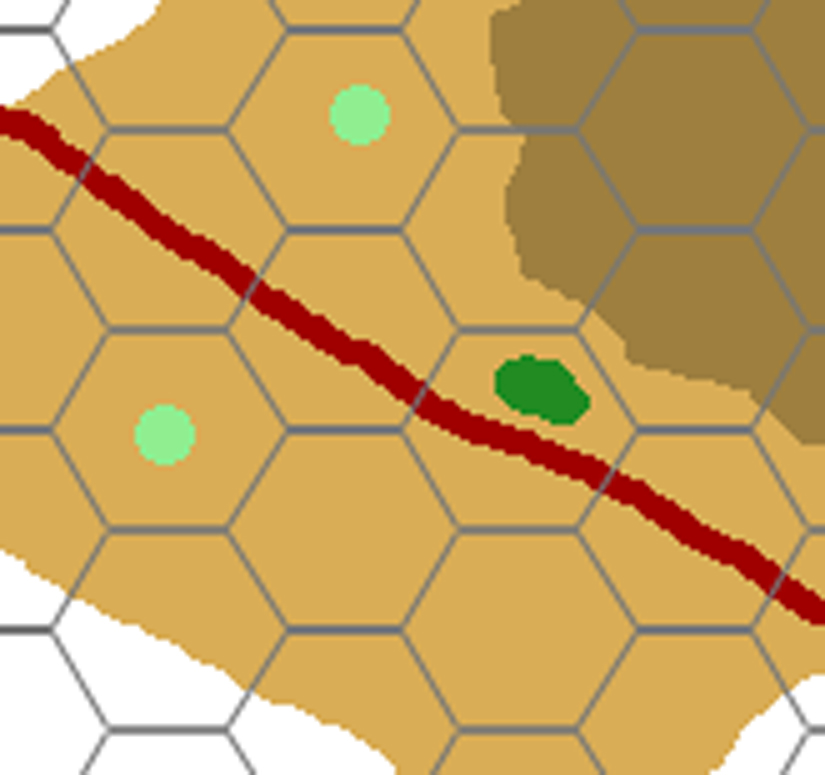
Some types of terrain are obviously exclusive with other types of terrain, however some terrain features can co-exist in a hex with other features. Here's a zoomed-in shot showing how to add more than one type of terrain to a hex when designing an input map. This shows a road, some woods, and a height all in the same hex.
Manual Placement of Map Tiles
Some map tile types cannot be placed using the input map and must be placed by hand.
Place bunkers and other directional types by clicking on the map and dragging.
Tiles that don't have directional information can be placed simply by clicking on the map.
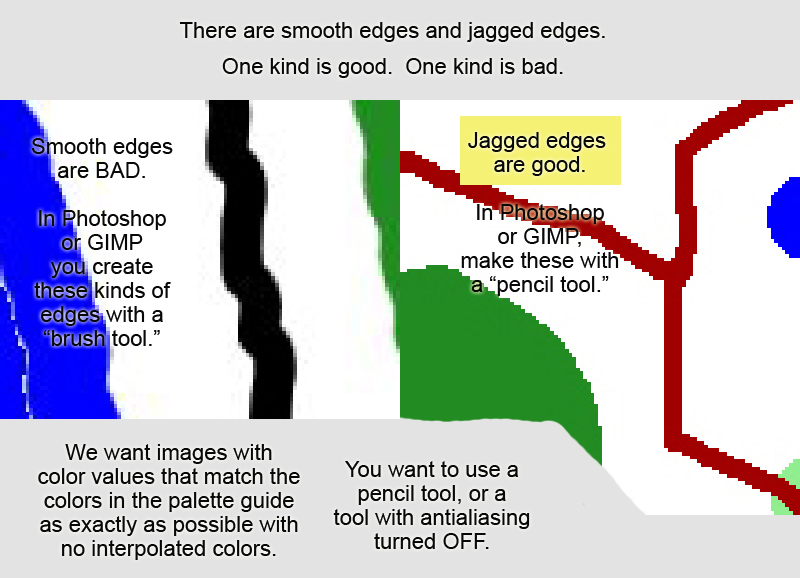
Avoid Anti-Aliasing
With any tools you use to make input maps, it's important to avoid anti-aliasing or smoothing the pixels in your image. As much as possible, you want to make sure that every pixel in your image is exactly one of the colors in the COH Palette Guide. The importer will do its best to figure out what you meant by pixels that aren't exactly the right color (it'll match them to the closest colors or ignore them). However, it's possible to introduce all sorts of stray features if you use too many pixel-smoothing tools.
You'll also have to build your LOS file; this can be found on the Editor menu drop-down. This must be done before a map can be used for a scenario.
