Game Instructions: Difference between revisions
| (One intermediate revision by the same user not shown) | |||
| Line 459: | Line 459: | ||
Mouse over a fortification or obstacle to see its type displayed at the bottom of the screen, along with any relevant modifiers, just as with basic terrain. | Mouse over a fortification or obstacle to see its type displayed at the bottom of the screen, along with any relevant modifiers, just as with basic terrain. | ||
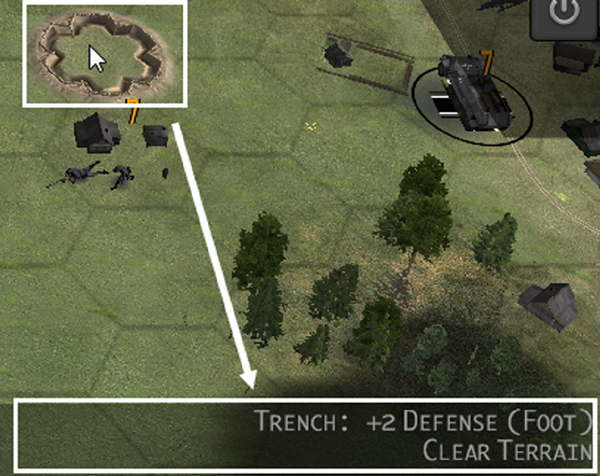
[[Image:COH_Screenshot_034.jpg|none|border| | [[Image:COH_Screenshot_034.jpg|none|border|350px|thumb|Viewing fortification/obstacle modifiers and terrain info.]] | ||
* '''Bunkers''': | * '''Bunkers''': | ||
Latest revision as of 16:42, 31 May 2012
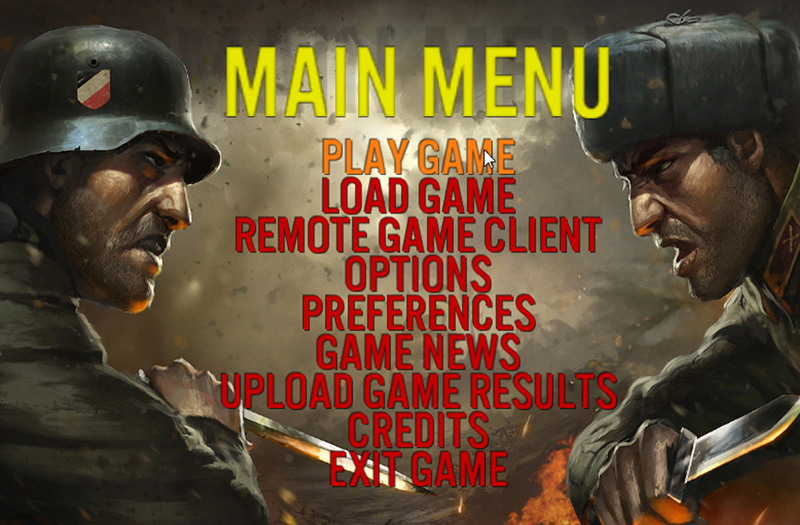
Main Menu
- Play Game – There are several kinds of firefights from which to choose:
- Awakening the Bear Firefights – Firefights from the board game version of Conflict of Heroes – Awakening the Bear
- Frontier Firefights – Firefights set in Ukraine during Operation Barbarossa
- The Commanding Heights – A series of related firefights set in the Crimean Peninsula, each of which uses a different portion of one large map
- Point Buy Firefights – A collection of maps for quick pick-up games or skirmish-style firefights
- Additional Firefights – A list of firefights stored in your (My)Documents\Western Civilization Software\Conflict of Heroes -Awakening the Bear\Data\Scenarios folder. Put fan-created and modded firefights here and play them with this option.
- Load Game – Loads a save game from a file. By default, saved games are loaded from the directory (My) Documents\Western Civilization Software\Conflict of Heroes – Awakening the Bear\Save.
- Multiplayer Lobby Game – Allows you to enter the Multiplayer Lobby and Forum to meet other players, issue and accept challenges, discuss scheduling and host and join multiplayer games. See the Multiplayer Lobby Games section below for more information.
- Local Network Game – Allows you to join a game on your local network, without connecting to the multiplayer forum or lobby. A game must first be setup and hosted before you can join it. Please see the Local Network Games section for more information.
- Rule Options – Rule Options affect the way the game is played. Options cannot be changed during a game. This includes saved games: if you save a game with a certain set of options, change your options for another game, then load the saved game later, your options will revert to the set from the saved game. Click the option to change the setting: “Yes” for on, “No” for off.
- Fog of War – If fog-of-war is turned on, players cannot see hexes that are outside of the line-of-sight of their units.
- Variable Action Points – Instead of receiving the standard 7 APs per unit at the beginning of a round, a player may receive variable action points instead. The player may choose from two variable action point options:
- + 2D6: the sum of two (virtual) six-sided die rolls, or
- + 3D6 High-Low: the sum of the highest and lowest die rolls on three (virtual) six-sided dice. This gives less volatile results.
If the Dice Camera is turned on, the player makes these rolls himself. (See the Dice Camera document for details.)
- Difficulty Level – To increase the challenge of playing against computer-controlled opponents, increase the difficulty level. At higher difficulty levels, the computer opponent receives a variety of material advantages. See the FAQ document for details.
- Foot Unit Cautious Movement – If foot unit cautious movement is turned on, any infantry squad unit that makes a normal move into a hex that lacks a defense bonus suffers a -1 defense modifier, during the opponent’s turn. To avoid this penalty, units can spend extra AP to move cautiously. To move cautiously, hold down the CTRL key while right-clicking when issuing a move order. This adds +1 to the AP cost for each move. (See below for rules on movement and combat.)
- Random Quality – If this option is turned on, units that would otherwise start with Regular quality level instead have their quality level randomized. (See Unit Quality for more information.)
- System Preferences – Used to control video, gameplay, and audio options. Preferences can also be changed in-game and unlike rule options are not part of the game file. Some video preferences will not take effect until the game is restarted.
- Game News – Find out about what’s going on with Conflict of Heroes updates, expansions, new firefights, and related products. (You can also receive information about game news by visiting www.matrixgames.com/forums/tt.asp?forumid=1040.)
- Upload Game Results – Help Western Civilization Software balance and improve the difficulty of Conflict of Heroes firefights by uploading the results of the games you have completed so far (or since the last time you uploaded game results). When you select this menu option, the results of games you played against the AI are uploaded to our FTP. No personal information is transmitted.
Game Setup
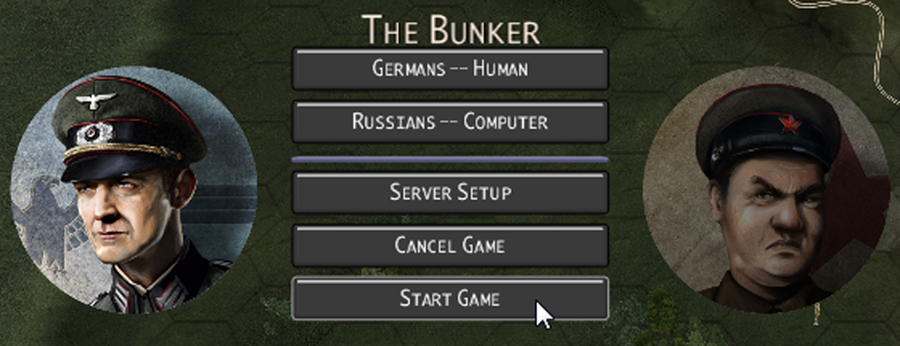
- Human / Computer Player Buttons – Use these buttons to determine whether the Germans or Russians will be controlled by the human player, or by the computer. You can set both players to “human” in order to play a hot-seat game.
- Human-Preferred Side – Some firefights have a “human-preferred” side, indicating that the firefight has been designed and balanced with the intention that the human player should play the indicated side. You are allowed to play the non-human-preferred side in a firefight if you choose, but you might then find the firefight somewhat unchallenging.
- Server Setup – Use this to open the Server Setup Screen in order to host this game over TCP/IP or LAN. (See the Local Network Games section.)
Planning Phase
When you start a new game, before most of the movement and firing begins, you may be asked to do some game setup or round-planning, such as planning artillery strikes, placing objects like barbed wire or land mines, or positioning reinforcements for the turn. This can sometimes take place before the first round of combat.
Artillery Strikes and Laying Down Smoke
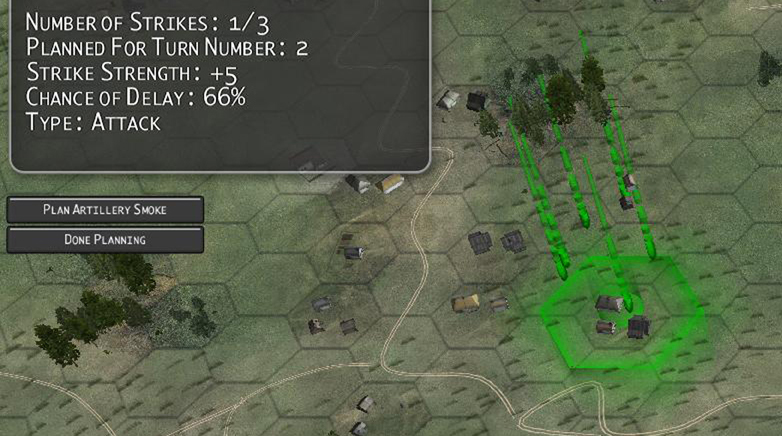
To plan an artillery strike, click on a highlighted area on the map with the right mouse button during the planning phase. Sometimes you may be prompted to plan more than one artillery strike at a time. Artillery strikes affect the hex on which you click and all six adjacent hexes, attacking friend and foe alike. Usually artillery strike planning is for a strike that will occur at the beginning of the following turn, but sometimes you will be prompted to plan for strikes in even later turns.
Right-click on a hex in the area indicated by the blinking blue highlight to place an artillery strike. Click the “Done” button when you are finished. Sometimes you will be able to place artillery strikes anywhere on the map, but other times will be limited as to where strikes may be placed.
In certain firefights, some artillery strikes have a chance of delay. If a delay occurs, the strike will not happen during the round for which it was planned, but will be delayed one or more rounds.
In some firefights, some artillery strikes deliver smoke instead of high explosive (HE) attacks, and for some strikes you will have the option of deciding whether the strike will deliver smoke or an attack.
You can undo an artillery strike (whether HE or smoke) you have placed by clicking on the hex of a planned strike.
Reinforcements
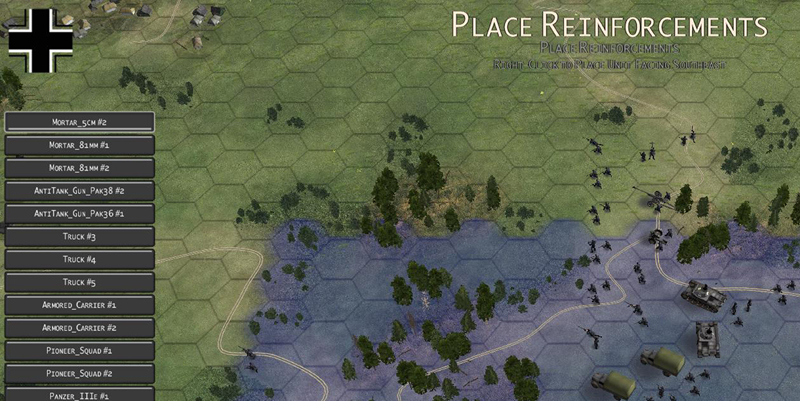
Reinforcements enter the game before the start of a round. These rounds vary from firefight to firefight. The zone in which a reinforcement may enter is indicated by a blinking blue highlight. Right-click on a hex in the highlighted zone to place a unit for reinforcements, keeping an eye on the mouse cursor arrow to control the facing of the new unit. You can choose which reinforcing unit is to be placed next by clicking on the unit’s button to the left.
Reinforcements may enter the game loaded onto a vehicle. When placing a reinforcement, left-click on a vehicle located in the reinforcement zone to load the reinforcement onto the vehicle. This will not work if the rules do not allow the unit to be loaded onto the vehicle. (See Rallying, Hiding, and Other Unit Actions for details on loading.)
Fortifications and Obstacles
Right-click to place military fortifications and obstacles, such as barbed wire, mine fields and bunkers, on the map. Information about your placement appears at the upper left of the screen. You may undo placements with the “Undo” button. Press “Done” when you are finished placing terrain features.
Hiding Units
Some firefights also ask you to place hidden units, which then enter the game hidden (see Rallying, Hiding, and Other Unit Actions). If Fog of War is enabled, units that are not within the line of sight of any friendly units will not be seen, but they do not gain Hidden status simply by being out of sight.
Point Buy Games
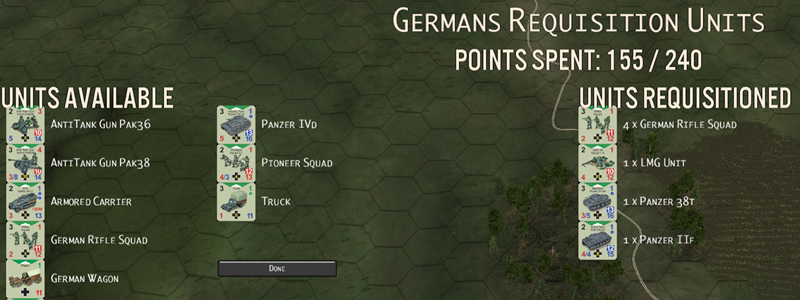
Some firefights allow one or both of the players to requisition units at the start of the firefight. Players are given a certain number of points to spend requisitioning units. The types and numbers of units available for requisition are determined by the firefight. Units that are requisitioned enter the firefight as reinforcements on the first turn.
Playing the Game
Main Screen Information
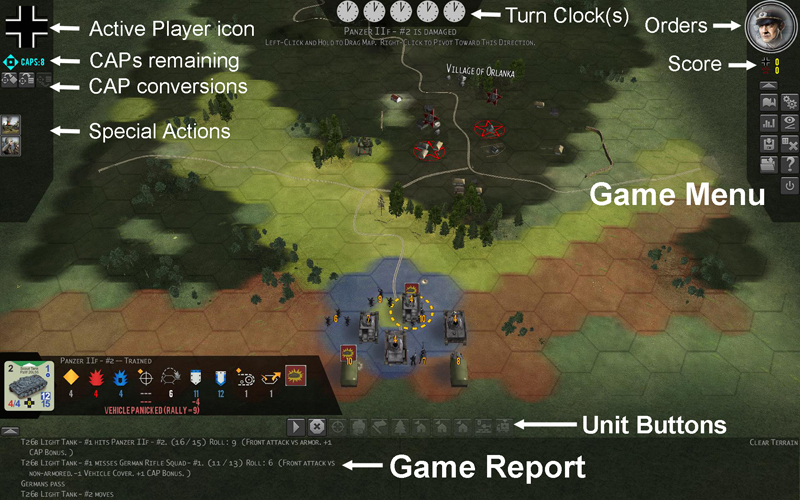
- Game Menu
Mouse over each button for its label and settings.
- Hide Game Menu – Hides the Game Menu.
- Game History – A display of the last several hundred lines from the game report.
- Combat Statistics – A report on unit destruction.
- Save Game – Saves the game.
- Open Game – Opens a saved game.
- Preferences – Opens a display allowing you to adjust video, audio, and gameplay preferences.
- Camera Control – Switches the game camera between normal and top-down modes. Note that the camera maintains its position in each mode independently of the other.
- Dice Camera – Toggles use of the Dice Camera, allowing you to use a webcam and a pair of six-sided dice to roll your own combat results (see the Dice Camera document).
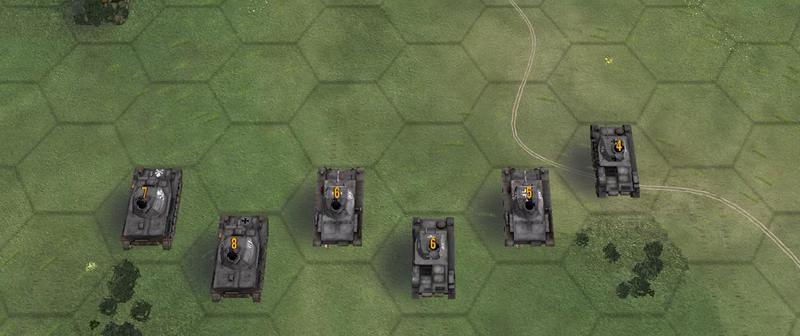
- 2D Chit / 3D Unit View – Switches the game between displaying units as 2D Chits and animated 3D Units.
- Briefing Map – Shows the briefing map for this firefight, including deployment areas, objectives and reinforcements.
- Help – Opens in-game help files.
- Exit – Exits back to the main menu.
- Score – Shows the current Russian and German score.
- Commander and Firefight Orders – Click on the commander mug shot to open a description of your orders for this firefight.
- Turn Clock(s) – The clocks show how many rounds are in the firefight altogether, and how many rounds have passed so far. Reinforcement arrivals and artillery support are shown on each turn clock, with an icon that shows the side which receives them.
- Active player icon – Displays the icon of the active human player. If the active player is computer-controlled, the icon is shown grayed-out.
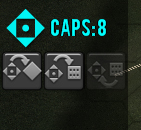
- CAPs Remaining – Shows CAPs (Command Action Points) remaining for the current human player (see Command Action Points).
- CAP Conversions – These buttons allow you to convert CAPs to APs, and to raise or lower roll bonuses (see Command Action Points).
- Special Actions – Images to the left show the special actions you can take on your turn. Mouse over each for more information; left-click to select one (see Special Actions).
- Unit Buttons – Use these buttons to allow the selected unit to perform more detailed commands (see Unit Buttons).
- Game Report – Displays a summary of the last few actions that happened in the game. Use the toggle button above the report area to hide this display. You can open and close the Game Report using the toggle button in the lower left-hand corner of the screen.
Moving the cursor around will show you the following:
- Unit Tooltip – Shows basic information about either the unit last selected or the unit under the mouse cursor.
- Terrain Information – Shows information about the terrain in the hex under the mouse cursor.
Camera Controls
- To scroll across the map:
- Move the mouse cursor to the edge of the screen, or:
- Left-click on the map surface and drag.
- To change the camera angle:
- Right-click on the map surface and drag the mouse. Dragging the mouse left-right rotates the camera. Dragging the mouse up-down tilts the camera.
- CTRL + mouse wheel rotates the camera.
- ALT + mouse wheel tilts the camera.
- SHIFT + mouse wheel changes the camera height.
- Note that using the mouse wheel without CTRL / ALT / SHIFT will reset the camera to the default height/angle setup.
- You can also use the <Page Up> and <Page Down> keys to adjust the camera: these two keys work with CTRL, ALT, and SHIFT in the same manner as described for the mouse wheel.
- To zoom in and out:
- Use the scroll wheel on your mouse.
Selecting and Moving Units
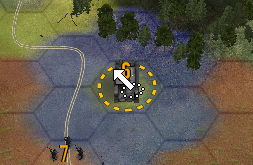
- Left-Click a unit to select it – You can switch among your units freely during your turn. The dotted indicator in the image below indicates the current active unit, which is the last unit selected by the active player. The arrow is the selection arrow. The number is the unit’s remaining AP.
- You can also select multiple units for a group-move. See Group Movement for more information.
- Right-Click to Move – Right-click on the blue blinking area to move the current active unit to the hex on which you clicked.
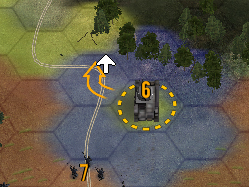
- Facing: Move the cursor toward the edge of a hex to face the unit in that direction after it moves into the hex. The mouse cursor arrow shows you the facing the unit will have after it enters the hex you click on.
- (Note that the movement facing arrow supersedes the unit selection arrow: left-clicking on a unit will still select it, if it is eligible to be selected).
- Cost to Move: Each unit has a base AP cost to move. Terrain in the destination hex may increase the AP cost of the move. Moving backward imposes an additional +1 AP cost.
- Bonus Moves: Some fast units (vehicles) get one or more bonus moves after they take a move action. The word “BONUS” appears over a unit when it is taking a bonus move. You cannot fire or take other actions during a bonus move. Bonus moves for treaded vehicles may only be made into clear terrain that does not change height. Bonus moves for wheeled vehicles may only be made along roads. (See Terrain). If you need to, you can end a bonus move with the “Pass” button on the unit buttons bar (see Unit Buttons), or by hitting <spacebar>.
- No Stacking Limits: There are no stacking limits in Conflict of Heroes – any number of units may share the same hex. However, note that a combat attack will affect every unit in the hex if it is targeted for attack. This should discourage players from stacking too many units in a hex.
- Right-Click to Pivot – Right-click on the map outside of a blinking blue movement area to pivot the current active unit toward the hex on which you clicked. A pivot like this ends your turn and costs 1 AP.
- Click “Pass” to Skip Turn – You can skip your turn instead of moving, firing, or taking other actions by passing. If both players pass in sequence, the round ends.
- Cycle Through Units with APs – Any side buttons on your mouse cycle through units with APs Remaining. The + and – keys will do this as well.
Attacking
- Hover Over Enemy to Target
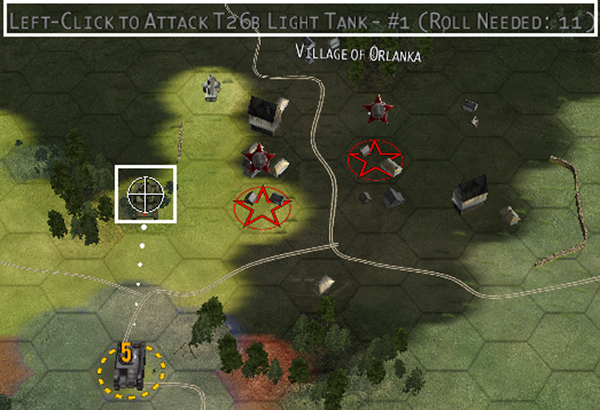
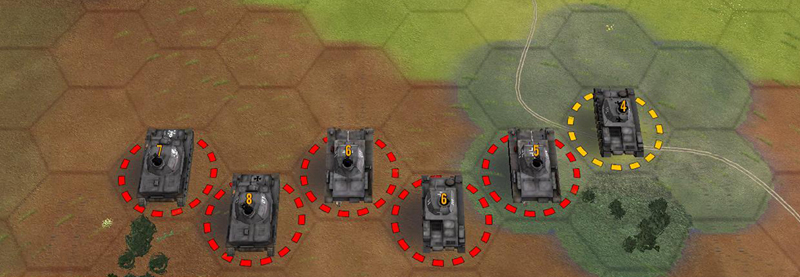
Move the mouse cursor over an enemy unit to get information about an attack against that unit. Crosshairs and dots indicate that the current active unit is able to attack the target: white dots indicate the attack is within short range; gray dots indicate that the attack would be made at long range, with a penalty.
If you are unable to attack, the reason is shown at the top of the screen. If you are able to attack, the roll needed to hit (on two six-sided dice [2D6]) is shown at the top of the screen. Note: You may modify the roll needed to hit with up to 2 CAPs.
- Arc of Fire
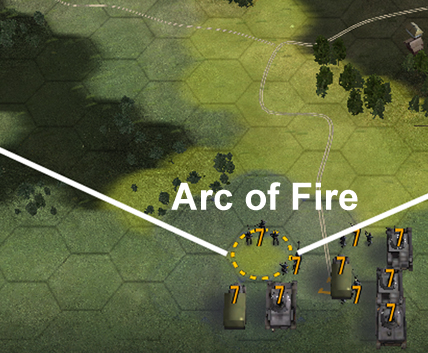
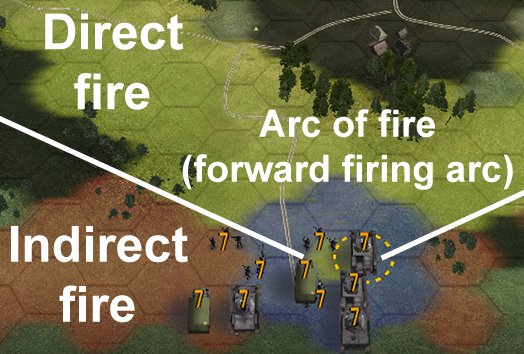
- Some units, such as guns and infantry squads, may only fire in the direction they face i.e. their forward arc. Other units, such as tanks, can fire in any direction, though they pay an additional +1 AP cost to fire outside of their forward arc. (The forward arc is the arc of fire for each unit, even though for tanks it is really only their forward firing arc.)
- Hexes are highlighted in light green if they are within the arc of fire of the current active unit (direct fire). Hexes are highlighted in light crimson if they are outside the arc of fire of the current active unit, but can still be attacked by that unit (indirect fire).
- Line-of-Sight
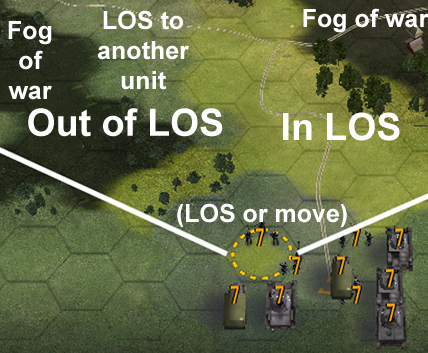
- Units must have line-of-sight (LOS) to an enemy unit in order to attack it. (Exception: mortars - see the following sub-section.) LOS can be blocked by terrain and by smoke. A unit in a hex with an enemy unit has no LOS beyond that hex. Hexes are highlighted in light crimson if they are outside the arc of fire of the current active unit, but can still be attacked by that unit (indirect fire).
- Mortar Units
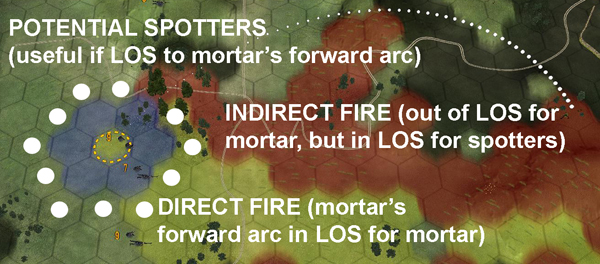
- Like infantry units, mortars may make direct attacks on units in their forward arc LOS. In addition, some mortar units can fire at targets they cannot see by firing indirectly using spotters. A mortar’s spotters are abstractly considered to be located in any hex within two hexes of the mortar unit, so long as it has LOS to the mortar unit. A mortar can make an indirect attack on any enemy in its forward arc that can’t be seen by the mortar but can be seen from one of its spotter hexes. (However, mortars also have minimum firing ranges; see Range below).
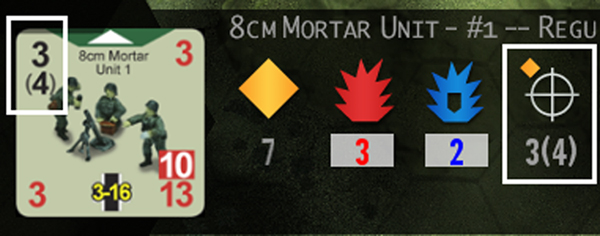
- An indirect attack is made like a normal attack but costs additional APs, as indicated in parentheses below the normal attack cost on the mortar unit.
- Note that not all mortar units are capable of indirect fire.
- Left-Click on Enemy to Attack
- Attacks are made against every unit in the target hex, both friend and foe alike. The exception is units in close-combat (that is, in the same hex as their target enemy; see Range), which are not forced to attack friendly units in their hex.
- Stats and the Combat Roll: The strength of the attacker, i.e. the attack value, is determined by the roll of two virtual six-sided dice [2D6] (or two real ones if using the Dice Camera). This die roll result is added to the firepower of the attacking unit, plus any relevant attack modifiers. The attack value is then compared to the strength of the targeted unit, i.e. the defense value. A unit’s defense value is the sum of its defense rating, plus any terrain modifiers present in the hex it occupies.
- If the attack result equals or exceeds the defense result, the target is wounded, and takes on a randomly-determined “wounded condition” (see Wounded Conditions). If the attack result equals or exceeds the defense result by four or more, the target is destroyed outright. A unit that already has a wound condition that receives an additional wound is destroyed.
- Red vs. Blue Attack and Defense Values
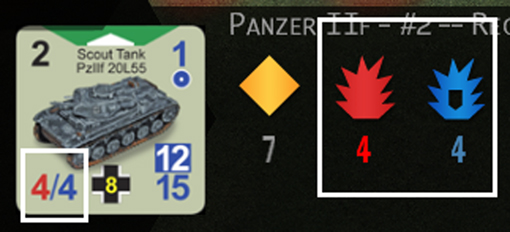
- Each unit has a red and blue firepower. Red firepower is used against targets with red defense ratings and blue firepower is used against targets with blue defense ratings. Red firepower represents anti-personnel attacks or high-explosive munitions. Blue firepower represents anti-tank or armor-piercing rounds. Units with blue defense ratings are armored, whereas units with red defense ratings are unarmored.
- Some field and anti-tank guns have a blue front defense rating and a red flank defense rating to model the large forward facing gun shield (see the following sub-section).
- Flanking
- Each unit has a separate forward and flank defense value.
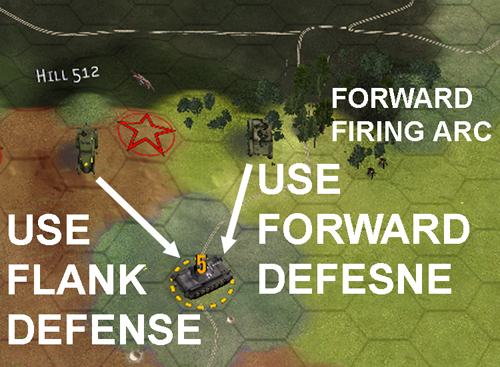
- Units that are attacked from a hex that is inside of their forward arc use their front defense rating to determine their defense value. Units that are attacked from a hex outside their forward arc use their flank defense rating to determine their defense value.
- Some units have one color for forward defense, and the other for flank defense.
- Units attacking a mixed unit from its forward arc use the attack value whose color matches the mixed unit’s forward defense color. Units attacking a mixed unit outside its forward arc use the attack value whose color matches the mixed unit’s flank defense color.
- Just remember always to use the matching color: red attack always matches red defense; blue attack always matches blue defense.
- Terrain: Terrain modifies a target’s defense value (see Terrain).
- Vehicles as Cover: Any infantry squad (rifles, pioneers, SMGs) in the same hex as a friendly vehicle (wheeled or tracked) receives a +1 bonus to their defense values. This does not apply to loaded units (see Rallying, Loading, and Other Actions).
- Range
- Each unit that can attack has a base attack range.
- Units can attack with no penalty up to their base attack range. Units can fire out to twice their attack range, but then receive a -2 attack penalty to their attack value. Units cannot attack beyond twice their attack range.
- Some units, like mortars, also have a minimum attack range, which precedes their base attack range on their stats. For example, for a unit with a range of “3-18” 3 is the minimum attack range, 18 is the base attack range.
- For units with a minimum range, enemy units that are within this minimum range cannot be fired upon except in close combat.
- +3 for Close Range: Units receive a +3 attack bonus when firing at units in adjacent hexes.
- +4 or -2 for Close Combat: rifles, pioneers, SMGs, tanks, armored cars, and APCs receive a +4 attack bonus when firing at units in the same hex as themselves. MGs, guns, mortars, wagons, and trucks receive a -2 attack penalty in close combat.
Unit Tooltip Values
The essential movement and combat values and costs are shown on the unit tooltip, in the following order:
- AP remaining
- Firepower: soft (added to die roll)
- Firepower: armor (added to die roll)
- AP cost to fire
- Range
- Forward defense rating, either blue (armored) or red (soft)
- Flank defense rating, either blue (armored) or red (soft)
- AP cost to move
- Number of bonus moves
A grey box behind the attack values indicates the unit receives the Close Combat -2 attack penalty.
If a unit is wounded, you’ll see a hit counter at the end of the tooltip.
Hit Counters
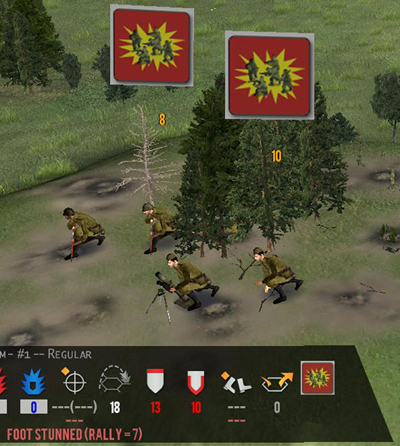
A unit that is damaged during an attack (but not destroyed outright) receives a hit counter. There are a variety of hit counters for foot and for vehicle type units. The hit counter is displayed over any damaged unit. The details of your hit counter are shown on the unit tooltip display of a damaged unit, including any modifiers to unit values, and the die roll needed to rally the unit. Hit counters can affect movement, attack, and defense.
Note that the details of enemy hit counters will remain hidden to you, until the enemy unit takes an action involving a unit statistic that is modified by its hit counter. Before this occurs, you will be able to see that an enemy unit is damaged, but you will not be able to see the particular effects of its hit counter in the unit’s tooltip display.
Rallying, Hiding, and Other Unit Actions
Rallying
Wounded units can be rallied using the “Rally” button (see Unit Buttons). Rallying costs 5AP for all units. A successful rally attempt removes the wound condition from the unit. Not all wound conditions can be removed, and the difficulty of removing a wound condition varies with the type of condition. Units receive a bonus to their rally rolls when they are in terrain with a defense bonus, and/or when they are in the same hex as other friendly unwounded units. Units cannot rally when in the same hex as an enemy unit. Some wound conditions do not permit rallying.
Hiding
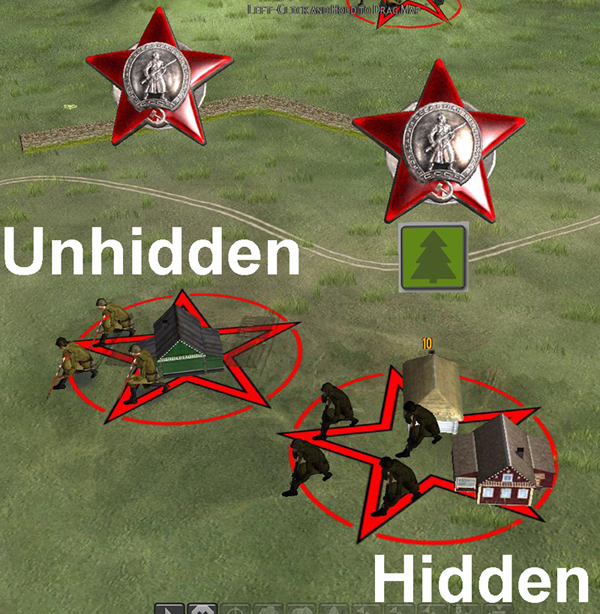
Units can hide using the “Hide” button (see Unit Buttons). Units can only hide when they are out of line-of-sight (LOS) of all enemy units. A hidden unit in clear terrain is revealed only when an enemy unit that has LOS into the hidden unit’s hex moves within two hexes of it. A hidden unit in terrain that either has a defense bonus or provides cover is not revealed unless an enemy unit enters its hex. Some units enter the game hidden. Hidden units cannot be targeted; players may use the “Attack” button on the unit buttons bar to attack hexes where they suspect hidden units may be hiding.
Hidden units may move while remaining hidden. It costs +3 APs to “hidden move” into a hex with terrain that provides cover. It costs +5 APs to “hidden move” into a hex with terrain that does not provide cover.
A player’s own hidden units are shown marked with a symbol that looks like a tree.
Hidden enemy units are not visible to you, only to the owner of the units. Ex: A German rifle squad moves back behind heavy woods, is out of the LOS of all enemy units, and disappears from the enemy’s view on the map. The German “Hides” the unit during his next turn. He then “hidden moves” this unit forward into the enemy’s LOS range, but still remains hidden from enemy view.
Loading
Units can be loaded (includes transporting foot units and towing guns) onto most vehicles such as tanks, trucks and wagons by using the “Load” button. They can be unloaded using the same button. (See Unit Buttons.) When a unit is loaded onto a vehicle, the two units are considered to be in group action together: if the units have different AP totals at the end of the turn the lower figure will be applied to both, and this will continue in each subsequent turn. (See Group Actions.) The AP cost to load and unload a unit is equal to the base movement cost of that unit, and is deducted from the group at the end of the turn.
Guns and immobilized vehicles can also be loaded, in which case they are considered to be towed. Vehicles can generally carry one infantry squad, or they can tow one gun or immobilized friendly vehicle. Towed units remain in the same hex as the vehicle carrying them during movement.
Other Actions
Units can perform a few other actions as well, like attacking fortifications, laying smoke, digging hasty defenses, and entering and exiting buildings. See Unit Buttonss for more details. Unit Buttons
Towards the bottom of the screen is the unit buttons bar. Unit buttons will be grayed-out if they are unavailable. Mouse over available buttons to see their label.
Unit Action Buttons
Towards the bottom of the screen is the unit action buttons bar. Unit action buttons will be grayed-out if they are unavailable. Mouse over available buttons to see their label.
- Pass – Skips your turn. If both players skip their turn in sequence, the round ends.
- Pass Entire Turn – Skips all of your turns until the end of the round.
- Attack a Hex – Prompts you to choose a hex to attack. Use this button when you want to try and destroy military fortifications (like land mines or barbed wire) or to attack hexes in which you suspect a hidden enemy unit may be located.
- Smoke a Hex – Prompts you to choose a hex in which to place a smoke screen. Some units have the ability to place smoke at various ranges according to the firefight. (See Smoke Screen under Fortifications and Obstacles.)
- Rally – Spends 5 APs to attempt to rally a unit with a wound condition.
- Hide/Unhide – Hides and unhides the current active unit.
- Enter/Exit Structure – Use these buttons to enter structures located in the same hex as the current active unit, such as a bunker, trench, or house (see Terrain for more information on structures). Only certain types of units can enter a given type of structure. If a unit is inside a structure, the relevant Enter Structure button becomes an Exit Structure button. It typically costs 1 AP to enter or exit a structure.
- Hasty Defense – Non-vehicle units may construct a hasty defense, at the cost of 7 APs. This provides a +1 defense modifier to the unit. The defense lasts until the unit moves or pivots. Wounded units cannot build a hasty defense.
- Load/Unload Vehicle – Loads the current active unit onto a friendly vehicle that is in its hex. If there is more than one eligible vehicle, the user is prompted to choose a vehicle. The units are considered to be in group action together. If a vehicle is loaded, the Load button becomes the Unload button and takes a loaded unit off of the vehicle that is transporting or towing it.
Group Actions
Players can form a group of units for attack and movement purposes, lasting until the end of the round. Units formed into a group can perform actions together that cannot be interrupted by the enemy player. For instance, four units may be formed into a group and each of these units may be moved during a single turn; and, once grouped, they must move during the same turn.
- Creating groups: SHIFT + left-click to add to group. It costs no AP to do this.
- Contiguous units: Only contiguous collections of units may be formed into a group – that is, a unit may be added to a group only if it is in the same hex as a member of the group, or an adjacent one. All units in a group then move together before the end of a turn.
- Disband groups: Disband a group by left-clicking to select another unit outside the group without holding the <Shift> key, or by pressing the <Escape> key. It costs no AP to disband a group. Groups disband at the end of each round. Loaded units remain loaded until they are unloaded, however.)
- Group firing: The current active unit is considered the “fire-leader” and the target of the attack must be a unit on which the fire-leader can make an attack. All units in the group contiguous with the fire-leader with line of sight to the target and enough APs to fire will contribute +1 to the attack.
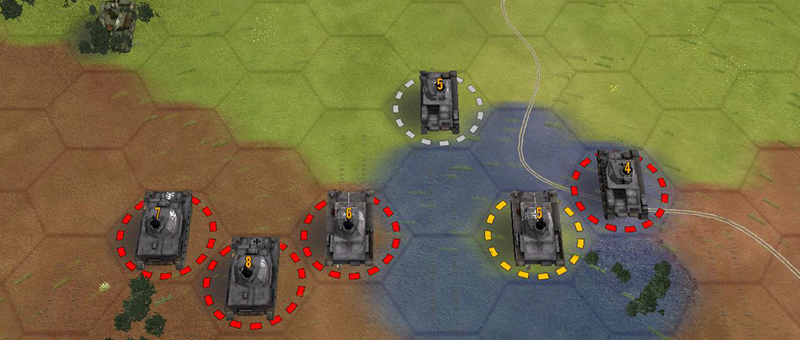 Grouped units; the middle unit highlighted in grey has finished moving, but is still part of the group. The second from left highlighted in yellow is the current active unit, and hence is the fire-leader. The group may only fire on units in LOS of the fire-leader, and direct and indirect attacks are based on the fire-leader's position.
- Remember that all units in a group move together before the end of the turn.
- CAPs can be added to groups to increase the APs of every member of the group. Important: these APs will be lost if the group is disbanded.
- Groups may also perform other actions together, such as group-rallying or group-hasty entrenchment. Every member that has sufficient APs remaining to perform the indicated action will attempt to do so. Note that once a group moves, none of the units in the group may rally.
- At the end of a turn, all units in a group move have APs reduced to the lowest AP value of any unit in the group (i.e., the weakest link). A group travels only as far as its slowest member. Ex: A HMG team with 2 APs remaining after a group move is grouped with a Rifle team with 4 APs remaining. The Rifle team’s APs are reduced to 2 APs at the end of the move to match the lowest remaining APs in the group.
Command Action Points (CAPs)
Command Action Points represent the influence of commanders on the battlefield action. Each player has a pool of CAPs independent of any particular unit. These CAPs can be transferred to units and converted into APs for the current active unit. They can also be used for increasing the odds of performing some attack or other action (up to +2 to attack rolls and rally rolls).
Use CAPs to get a roll bonus of up to +2 for attack rolls and rally rolls.
Players receive a certain number of CAPs each round according to the specifications of the firefight. CAPs are replenished at the beginning of the next round. CAPs cannot be saved from one round to the next. A player’s CAP allotment decreases by 1 from the base amount for every unit on that is destroyed in a firefight. (For example, if you have had two of your units destroyed, then you receive two fewer CAPs at the start of each round.)
Terrain
Basic Terrain
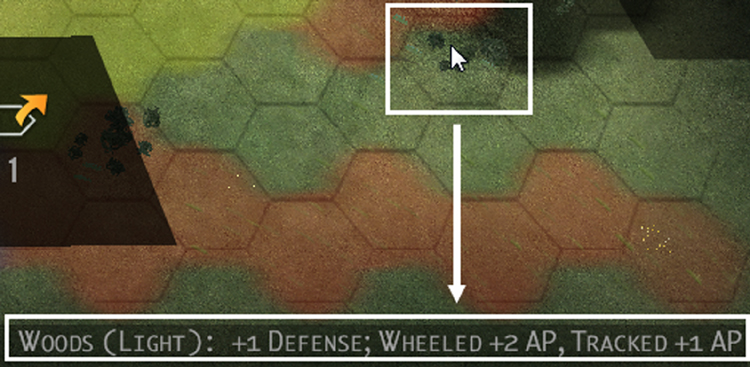
The width of a hex represents roughly 40-50 meters of ground. Each hex has a basic terrain type, which modifies movement AP costs for different types of movement, and adds defense modifiers for units in that hex. Some hexes also act as cover and units may stay hidden or be allowed to hidein these hexes (see Rallying, Hiding, and Other Unit Actions).
Mouse over a hex to see the terrain type displayed at the bottom of the screen, along with any relevant modifiers.
Terrain Movement Cost (in APs) and Defense Modifiers
| Terrain | Infantry Cost | Wheel Cost | Track Cost | Defense Modifier | Cover for Hiding |
|---|---|---|---|---|---|
| Clear* | 0 | 0 | 0 | 0 | No |
| Water | +4 | N/A | N/A | -1 | No |
| Marsh | +2 | N/A | +2** | +1 | Yes |
| Woods | +1 | N/A | +2 | +2 | Yes |
| Light Woods | 0 | 2 | +1 | +1 | Yes |
| Building (Wood) | +1 | N/A | +2 | +1 | Yes |
| Building (Stone) | +1 | N/A | +3** | +2 | Yes |
| Ruins (Wood) | +2 | N/A | +3 | +1 | Yes |
| Ruins (Stone) | +2 | N/A | +4** | +2 | Yes |
| Wheat | 0 | 0 | 0 | 0 | Yes |
| Corn | +1 | 0 | 0 | 0 | Yes |
*Includes all low-level, solid-ground terrain types such as Dirt, Sand, Grass, etc.
**Units of the indicated type have a chance to become immobilized upon entering a hex with this terrain type.
Roads
Roads permit more rapid movement. Terrain movement costs are ignored when moving along roads.
Walls
Walls protect units. Units in the same hex as a wall receive a +1 defense bonus from attacks crossing over the wall hex side. Wheeled units may not cross walls; tracked units may cross them but at a +1 cost to movement.
Height
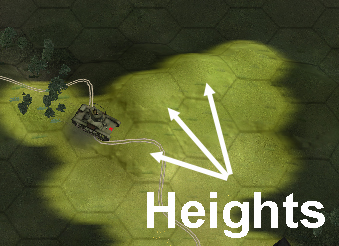
Some hexes have different elevation, or height. Moving up each level of height costs +1AP; vehicles may only move up one level of height per turn. It costs nothing to move down levels of height.
Units at a higher elevation attacked by the enemy units at a lower elevation receive a +1 defense bonus. Units at a higher elevation firing at enemy units on a lower elevation receive a +1 Firepower bonus. Multiple levels of elevation do not improve these modifiers; they are always +1.
Height also causes a plateau effect, cutting the LOS of units that are not close to the height edge. The further from the edge of a height level, the less the unit can see to lower levels and vice versa. This plateau effect can be improved or worsened depending on the height level, the covering terrain, and the distance of attacking and defending units from the height edge.
Fortifications and Obstacles
Fortifications and obstacles represent man-made modifications to a location. Hexes may have one or more terrain features in them. Some of these features are directional, while others have the same effect regardless of the direction of movement or attack.
You can attempt to destroy fortifications and obstacles by using the “Attack” button on the unit buttons bar (see Unit Actions).
Mouse over a fortification or obstacle to see its type displayed at the bottom of the screen, along with any relevant modifiers, just as with basic terrain.
- Bunkers:
- Wood Bunker
- (Regular) Bunker
- Heavy Bunker
Wood, regular, and heavy bunkers all share the same rules but provide different defensive bonuses. Infantry squads and guns may enter a bunker. A unit in the bunker can only assume the facing of the bunker unit.
- Wood Bunker: +4 defense front, +1 defense flank
- Bunker: +5 defense front, +2 defense flank
- Heavy Bunker: +6 defense front, +3 defense flank
- Gun Pits
Only guns may enter a gun pit structure. The pit provides units inside of it with a +3 defense modifier against attacks that come from the pit’s forward arc, regardless of the direction the units are facing.
- Barbed Wire
Barbed wire costs 4 additional APs for infantry units to enter, and 2 additional APs for tracked units. Wheeled units cannot enter a barbed wire hex. Barbed wire is destroyed when a tracked unit enters it.
- Trenches
Only infantry squads can enter trenches. Units in a trench receive a +2 defense modifier.
- Roadblocks
Wheeled vehicles cannot enter a hex with a roadblock. Tracked vehicles pay an additional 4 APs to enter a roadblock hex. Roadblocks do not affect foot movement.
- Land Mines
There are three types of land mines: foot mines, vehicle mines, and mixed foot-vehicle mines. A mine makes an attack against the flank of any unit of the appropriate type that enters the hex containing the mine. Mines laid by enemies are generally hidden until you discover them.
- Smoke Screen
Smoke has levels: newly laid smoke is Level 2 smoke. Level 2 smoke blocks LOS through the smoke-hex, and provides a +2 defensive bonus for targeted units within the smoke hex and to those units targeted by fire originating from the smoke hex . At the end of the round, Level 2 smoke becomes Level 1 smoke.
Level 1 smoke allows LOS to pass through it, and provides a +1 defense bonus for all attacks on the unit into, out of, and through the smoke.
The effects of multiple smoke screens in the same hex are cumulative.
Special Actions
Special Actions represent the influence of battlefield commanders, additional battlefield resources, or simply bad luck. Players play a Special Action as their only action for a turn, instead of selecting and using a unit.
Some special actions have an additional CAP or AP cost. Most special actions are performed as a single action, and thus cannot be combined with another action, such as moving a unit or firing, on the same turn.
- Command Action – Allows any unit to take one action at no cost.
- Defuse Land Mine – Remove one visible land mine, in a hex adjacent to a unit you control.
- Plus 1D6 APs – Current moving unit gains 1-6 random APs.
- Hasty Defense – Select a unit to gain a hasty defense.
- Rally Attempt – Allows the selected wounded unit to make a free rally attempt.
- Sniper – Causes the enemy to lose a random amount of Command Action Points.
- Reveal Hidden – Discloses hidden enemy units, within two hexes of a selected friendly unit.
- Stop Vehicle – Prevents a selected enemy vehicle from taking move actions this turn.
- Lay Land Mine – Adds a land mine adjacent to a selected friendly unit that is not in close combat with the enemy.
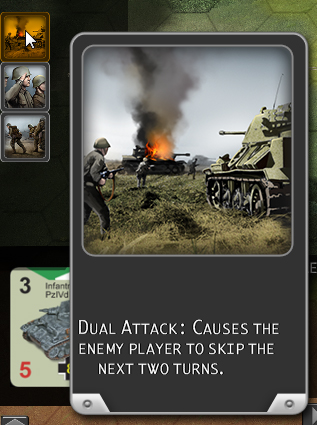
- Dual Attack – Forces the enemy player to skip the next two turns.
- Mark as Used – Removes all Action Points from a selected enemy unit.
- Auto-Rally – Automatically rallies a selected wounded unit.
Unit Quality
Units in Conflict of Heroes have a Quality rating that modifies the base attributes of the unit. The effects of a quality rating differ among infantry and vehicle type units. The quality of a unit is shown in the unit information area in the bottom left part of the screen when a unit is selected.
| Attack | Defense | Range | AP Attack Cost | Rally | |
|---|---|---|---|---|---|
| Green | -1 | -1 | -1 | +1 | |
| Trained | +1 | ||||
| Regular | |||||
| Experienced | +1 | ||||
| Veteran | +1 | +1 | +1 | ||
| Elite | +1 | +1 | +1 | -1* | +1 |
| Attack | Defense | Range | AP Attack Cost | Rally | |
|---|---|---|---|---|---|
| Trained | -2 | +1 | |||
| Regular | |||||
| Experienced | +1 | ||||
| Veteran | +1 | +1 | +1 | ||
| Elite | +1 | +1 | +2 | -1* | +1 |
*No unit can have its attack cost modified below 2.
Note that there is no Green quality modifier for vehicles.
Keyboard Shortcuts
Spacebar Pass turn / end bonus move PrintScreen Save copy of current screen to:
(My)Documents/Western Civilization Software/Conflict of Heroes Awakening the Bear/Screenshot
Shift-PrtScrn Save higher quality screenshot to same location as above
Escape Deselect all units Enter Enter/exit chat mode in TCP/IP games Tab Move camera to view currently moving unit + / - Cycle between units with APs remaining V Toggle view units T Toggles terrain C Converts CAPs to APs B Converts CAPs to Roll Bonus F Enter Fire (Attack Hex) Mode N Toggle display of unit abbreviations over unit icons I Toggle display of interface A-W-D-S These four keys move the camera left, forward, right, and backward.
